5 Economical Ways To Build A Home Photography Studio on a Budget
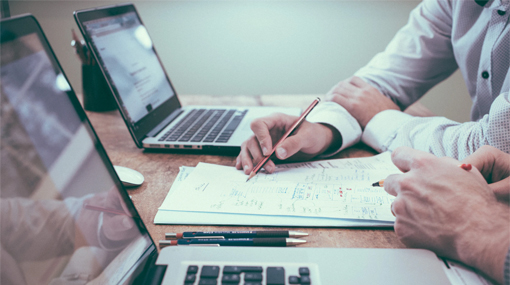
Every budding photographer’s dream is to build his own home photography studio. Not only this allows him to expand his business, but it provides him the freedom to explore the endless possibilities of his craft. However, many are afraid to do so because their limited budget gets in the way. If you are one of those people, you might want to reconsider as there are various ways to start up on your own without breaking the bank. With brimming creativity and resourcefulness, you will not be shelling out more than what is average on setting up a home studio. You just need to know the economical tricks to get started with your own photography studio. Ready to delve into the important deets you must keep in mind when you are restricted by your budget? Here are the ways you can save up on building a home photography studio.1. Find your creative space
The first thing you have to consider is where your creative spot will be, it could be your living room, an unused room, or a storage room. It all depends on the needs you have as a photographer. If your concentration demands a bigger space, then you should make sure that your house has an ample amount of space that can accommodate such. A bigger space offers the comfort of holding a number of people around; if your models need to change, it will be a plus point if you have extra space for that. In addition, you should consider getting a bigger room because you can easily work around with the focal lengths, and lights will not bounce off the walls as compared to a smaller space.2. Improvise on backdrops
Backdrops can be quite expensive, so the key to saving as much as you can is maximizing your creativity. Instead of purchasing from specialty stores, you can improvise with rolls of solid colored fabrics and papers. Invest in neutral colors like white, gray, or black. When you want a pop of color and the additional texture on your backdrop, you can use canvas or wooden boards and have them painted. Be creative and resourceful enough on finding ways to add character to your backdrops. You can use a sponge, paint, gels, and more of the things that can easily be found at home. On having these backdrops, you will need to set up your own cyclorama frame. You can build your own using PVC pipes and fittings or any metal rods. This will help you change your backdrops easier when you haven’t invested in the actual frame yet.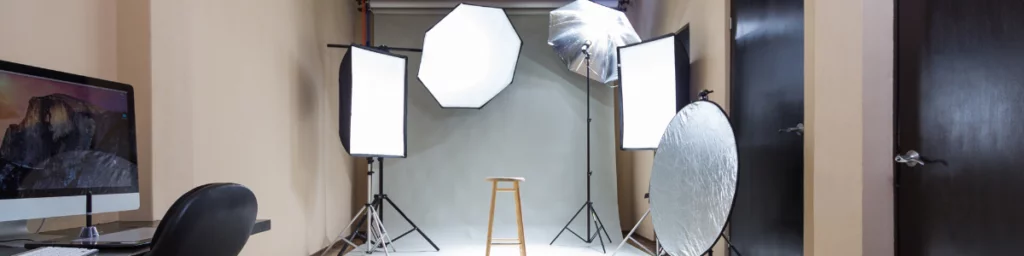
3. Know your source of light
Though you will be needing both natural and artificial lighting, it is important to consider which one you will need more. If you demand a natural lighting, you ought to choose a space that has big windows where the sunlight directly hits it. Natural light is the best light source so make the most out of it. Whereas with artificial lighting, you will need to invest in having the equipment to provide the desired light. There are two types of artificial lighting and they consist of the following:-
- Continuous light – is the artificial lighting that lets you see the turnout real-time. Though it is not as strong as the flash lighting, it does its job of providing ample light.
Continuous light could either be hot or cold. Hot continuous light sources include photoflood and quartz. They tend to be uncomfortable to models and the photographer as they are warm light. While the cold continuous light like LED or fluorescent bulbs are more comfortable, but also more expensive.
You can check out this list of budget-friendly LED lighting kits you can choose from if you’re on the lookout for a good set of continuous lights.
-
- Flash light – this artificial light is the one built-in with a camera. It is powerful enough to capture a good photo, although additional flash sources are preferred. You can save a lot more with using flash lighting.
You can check out this list of affordable yet competitive flash equipment to help you choose which one to get.
4. Invest in lighting modifiers
With a studio setup, you will have to curate lighting modifiers that will help you achieve the utmost quality of pictures. These will help you control the proper bouncing, diffusing, and blocking of the lights. Though they may be expensive, you can always scrimp on by creating alternatives or getting more affordable ones.-
- Umbrella – this is an essential for every photographer. It is used to create a wide range of lighting effects on your photos such as soft light, directed light, and wide-reaching reflected light. This is a good investment but you can find cheap options online like eBay.
-
- Softbox – this is an equipment meant to diffuse strong light. You can make your own softboxes by covering a standing lamp with a white cloth or paper. You should be careful with the material used when done to a warm light as it may cause combustion.
-
- Beauty dish – this works similarly to the softbox except that it doesn’t soften the light as to how the softbox does. You can improvise your own beauty dish by using an aluminum baking pan and your light. Cut out a hole into the center of the pan and make it as big as the light source. You can fasten it with a tape.
-
- Flag – this is a helpful tool in keeping specific areas dark. You can make a DIY flag by making use of black cardboard, clothespins, and a tripod. Then place the black side directly in front of the light source to avoid any light reflection
-
- Reflector – this is a good source of light when you are limited by a budget. If you have no actual reflectors yet, you can use anything white that has a flat surface. You can choose from using white cardboard paper, polystyrene, or aluminum foil.
-
- Gels – these inexpensive accessories are useful to correct white balance and add touches of color. Though they come in cheap, you can still save a lot by creating your own. You can substitute plastic binder dividers or colored cellophane.
5. Set up the additional equipment
When you are done setting up the above materials, your studio would not be complete without the essential equipment like tables, stools, and clamps. As obvious as they can be, they will provide you the comfort and support that you’ll need the entire time.-
- Tables – this is a given essential as you will be dealing with a lot of equipment and you’ll need a place to put them on. Folding tables are your cheap options.
-
- Stools – another essential you need, a handful of chairs will provide you and your models comfort during the session. There will be times that your subjects will need to pose on a chair so always keep them available.
-
- Clamps and clips – these must-have accessories work in various ways to help you on your studio. They can hold up your backdrop, attach a flag, and secure a continuous light onto a tripod.